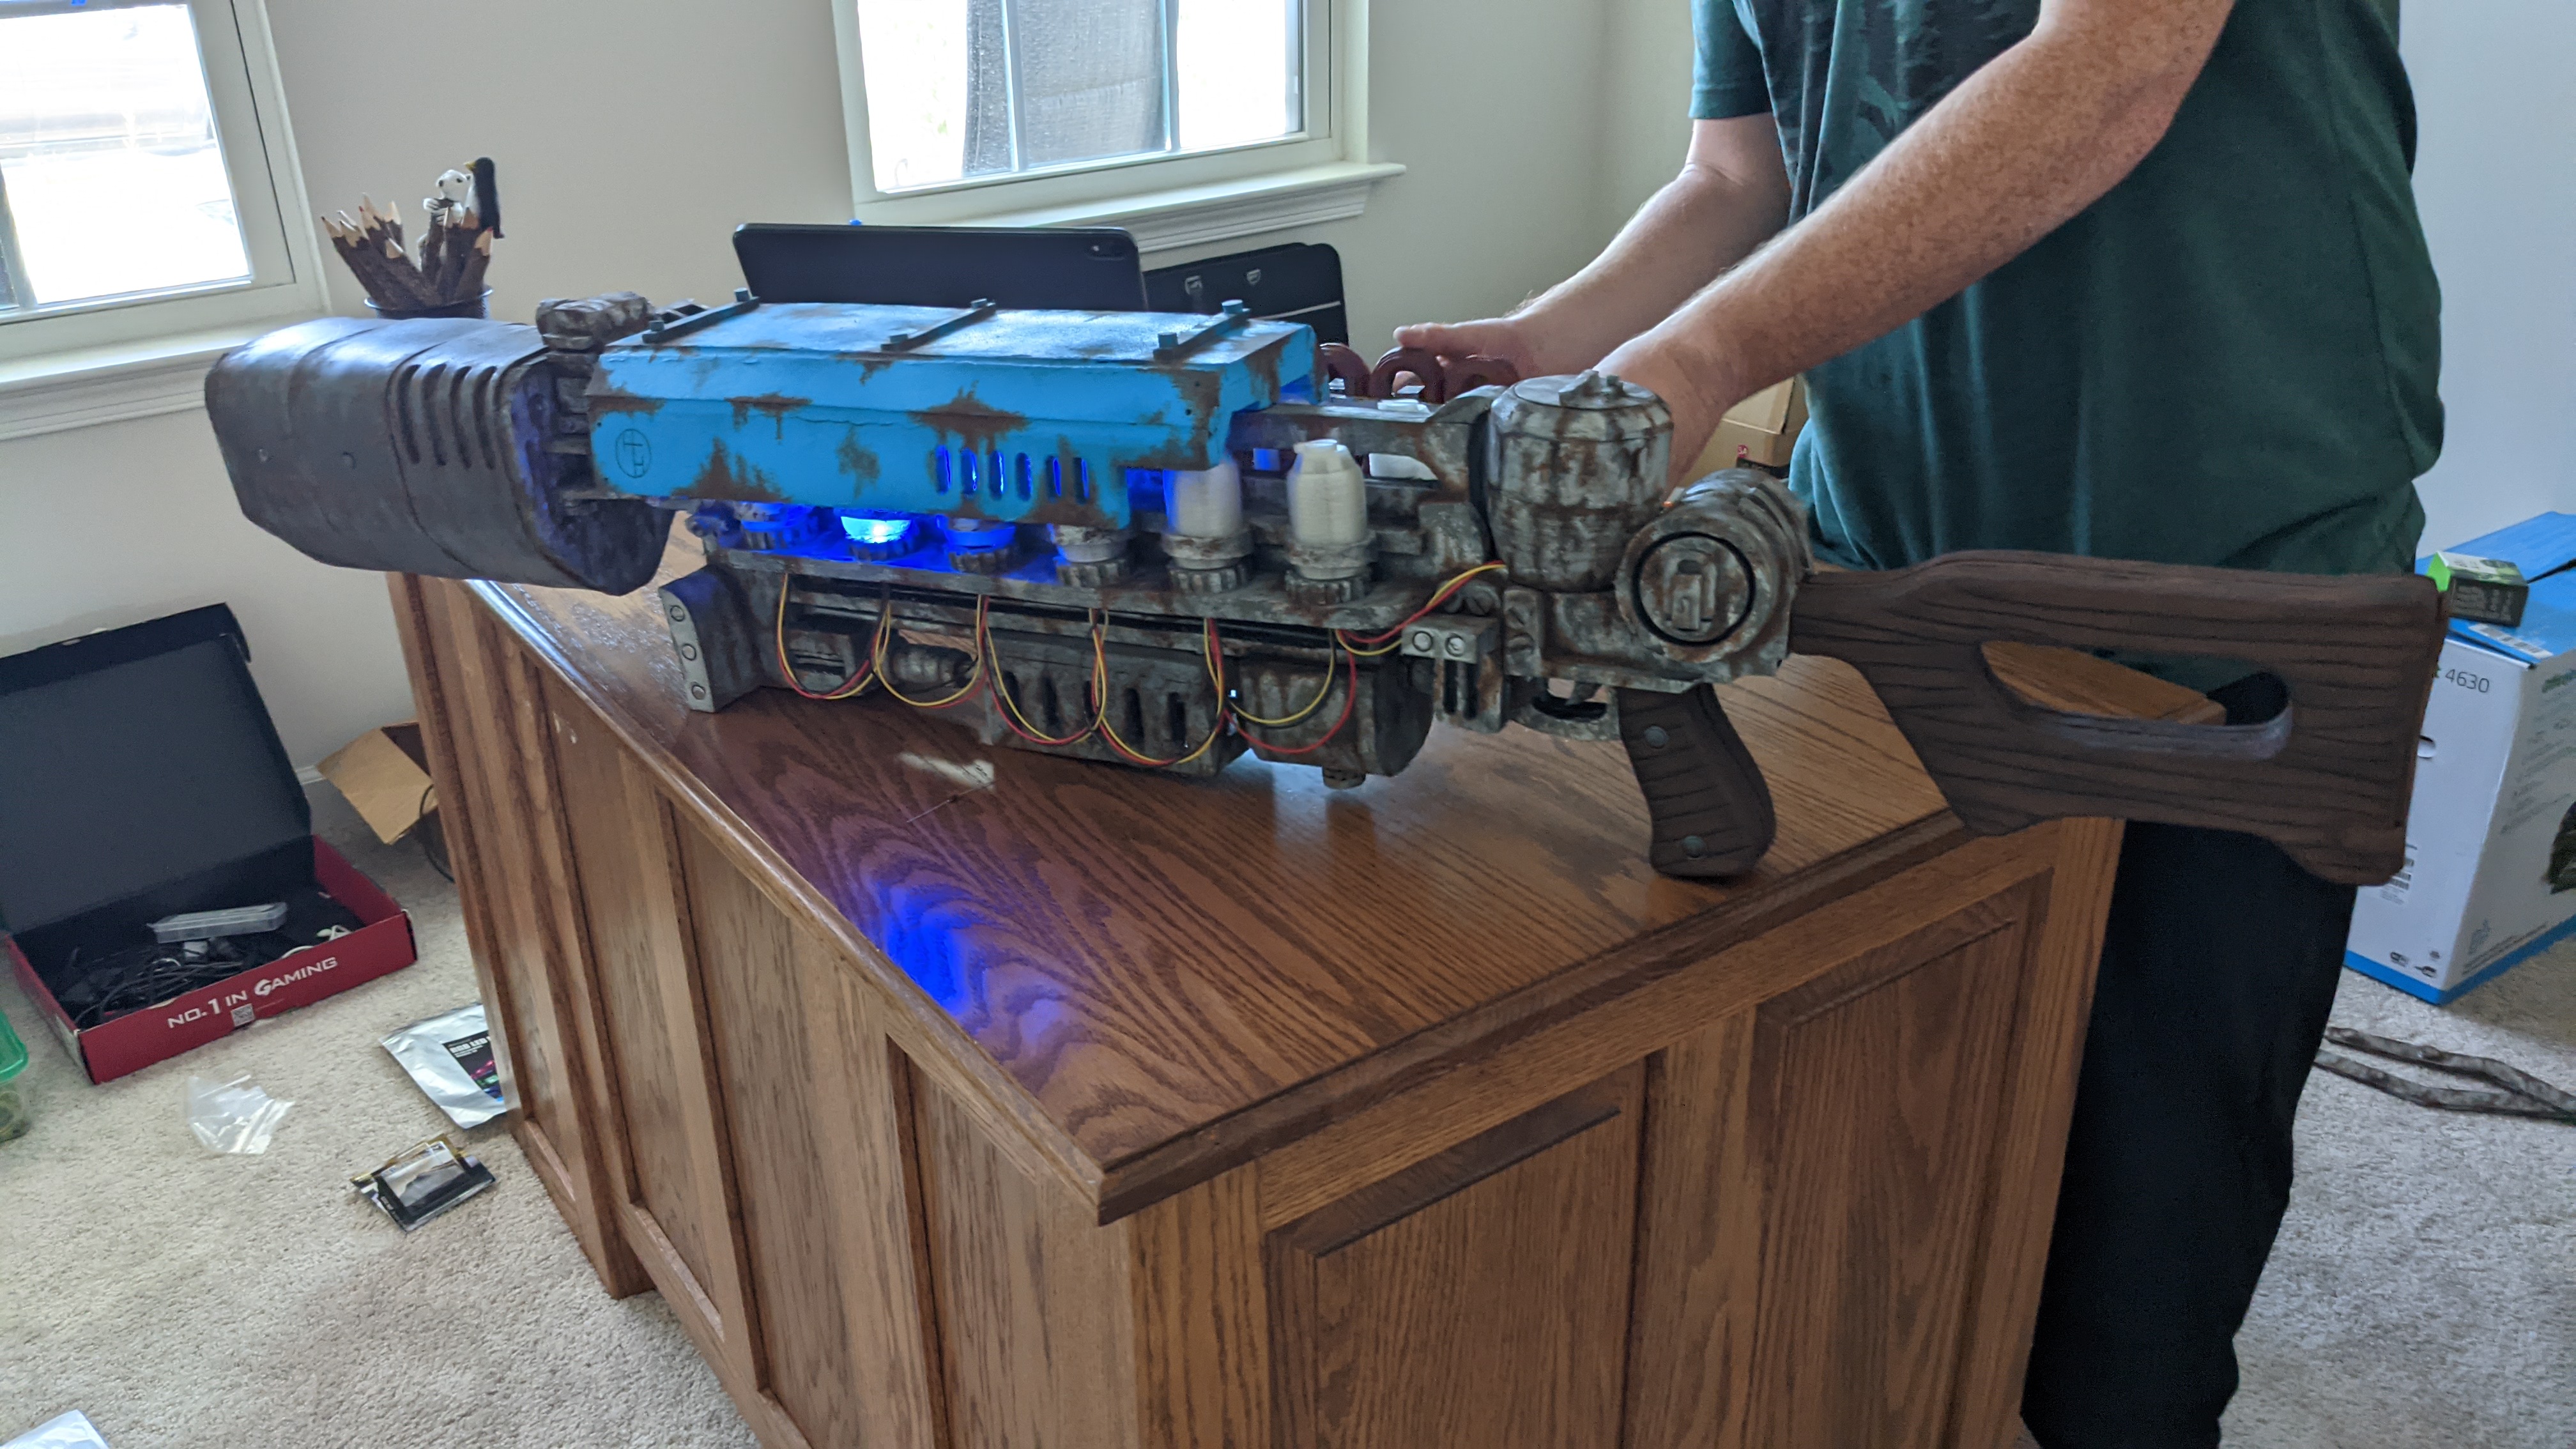
Gauss Rifle
Together, my friend Hayden and I built a Gauss Rifle from Fallout 4! Above is the final product.
Hayden is a master of the arts and created all of the physical pieces. A majority of the gun is styrofoam that was painted to look real. Most of the pieces connect with magnets that are superglued to the styrofoam. We also had another friend 3D print the canisters that have the lights inside of them. The art part is really cool, but I only really helped with the electronics part, so lets look at that!
Though Hayden started making the stencils and cutting the styrofoam in January 2021, we didn't finish until July! My first small electronics tests were on a breadboard with a spare Arduino Uno and a few LEDs I had laying around. I also found a receiver for an IR remote and programmed the board to increase/decrease brightness/flashing speed from the remote!

Eventually, we bought a 15ft strip of LEDs from Microcenter. Each LED is individually addressable, so there was a lot of control over the exact effect we wanted. Instead of doing that though, we found a library called FastLED that had convenient wrappers for simple control of the lights. Wiring the lights was also pretty simple - one 5V (red), one ground (black), and one data cable (yellow). Since we wanted a small strip of lights in each canister, we had to cut our full strip into many small pieces. At first, we tried soldering wire onto the contacts to join them, but this proved too difficult for our soldering skills. Instead, we found some convenient clamps that would clamp on to the end of the LED strip, poke through the contacts, and allow wires to come out the other side (also clamped).


We wired everything up using the Arduino Uno for testing, but in the end that board is much too large to fit in the housing Hayden cut out for our electronics. Additionally, we needed to power our board and LEDs without a laptop or wall outlet.
For a smaller board, we chose the the Adafruit Trinket 5V, which is extremely small and we can code it the same way! To power the board, we use a single 9V battery, which goes through a switch first before powering the board so we can turn the lights on and off. Our roommate from undergrad, Benji, was instrumental in helping us with the final steps and power management :).